Creating a rock garden can add beauty and charm to any outdoor space. Whether you have a small patio or a larger hillside, rock gardens can be a simple and elegant addition to your landscape design. If you’re unsure where to start, just think about the features you want to include and the overall goal of your design.
Rock gardens are a great way to soften the look of traditional gardens and add a touch of art to your outdoor space. They can be designed to be evergreen and low-maintenance, making them perfect for people who want a beautiful garden without the hassle of constant upkeep.
When designing your rock garden, it’s important to choose plants that can thrive in rocky soil and varying seasons. Creeping thyme, ferns, and Japanese pebbles are just a few examples of plants that can do well in a rock garden. Additionally, adding larger boulders and defining pathways with smaller pebbles can create the perfect setting for your rock garden.
Rock gardens also offer a great opportunity to incorporate elements such as a terrace or a patio into your design. By organizing the rocks and plants around these features, you can create a space that is both functional and aesthetically pleasing.
One thing to keep in mind when maintaining your rock garden is the importance of proper drainage. By making sure that water can flow freely around your rocks, you can prevent any damage caused by excess moisture. Additionally, pruning and spraying for pests will help keep your plants healthy and vibrant.
If you’re lost for ideas, there are plenty of resources available to help you get started. Many websites and social media accounts have compiled rock garden designs from expert designers. Additionally, participating in gardening forums or reaching out to local gardeners can provide inspiration and guidance.
So, whether you’re a seasoned gardener or just starting out, creating a rock garden can be a fun and rewarding project. Just remember to choose plants that are suitable for your climate and soil, and don’t be afraid to get creative with your design. With a little time and effort, you can transform your outdoor space into a beautiful rock garden that will be the envy of your neighbors.
Inspirational rock garden
Creating an inspirational rock garden can turn your backyard into a peaceful oasis. Rock gardens are a popular choice among gardeners because they require minimal maintenance and offer a unique and stunning focal point.
When designing your rock garden, consider the scale and size of the rocks you want to use. Rocks come in varying sizes, from small pebbles to large boulders. By carefully selecting and placing rocks of different sizes, you can create a visually appealing and natural-looking rock garden.
One inspiring rock garden design idea is to use rocks to mimic a beach or river landscape. You can combine different shades of rocks and pebbles to create the illusion of water and sand. This design is perfect for those who want to bring a piece of the beach into their backyard.
An inspirational rock garden can also be a tribute to nature and the outdoors. Consider incorporating plants and flowers that are native to your region. This not only adds color and beauty to your rock garden but also provides a habitat for local wildlife.
If you’re a crafty individual, you can take inspiration from the Kindness Rocks Project, where participants paint rocks with inspirational messages and leave them in public places for others to find. This simple act of kindness can bring joy and positivity to both the person who finds the rock and the person who leaves it.
When designing your rock garden, it’s important to consider the drainage needs of the plants you choose. Rocks can help improve drainage in your garden, allowing excess water to flow away from the plants’ roots. This creates a healthier environment for your plants to thrive.
Don’t be afraid to think outside the box when it comes to designing your rock garden. Rocks can be arranged in various shapes and patterns to create a one-of-a-kind design. You can even incorporate other elements, such as tree stumps or decorative bells, to add an extra touch of uniqueness.
Inspiration for your rock garden can come from anywhere. Whether it’s a picture you saw in a book, a trip to a botanical garden, or a memory from your childhood, use these experiences to guide your design choices. Your rock garden is an expression of your creativity and personal style.
Remember, your rock garden is a place for you to relax and enjoy the beauty of nature. Take your time, experiment with different designs, and create a space that brings you joy and inspiration.
Step 1: you will need some rocks
When it comes to landscaping and designing a rock garden, rocks are an essential element that can add depth and visual interest to your outdoor space. Whether you have a small backyard patio or a larger terrace, incorporating rocks into your design can create a zen-like and visually stunning environment.
Before you start gathering rocks, it’s important to consider the size and type of rocks you want to use. The right rocks can make all the difference in achieving your desired look and feel. You can choose from a variety of rocks such as granite, limestone, or even natural river rocks, each offering a unique texture and color.
Once you have chosen the rocks that best suit your design goals, you will need to organize and arrange them in a way that supports the overall aesthetic of your rock garden. You can create different levels and textures by using rocks of varying sizes and shapes. This can be done by arranging larger rocks as the focal points and using smaller rocks as fillers around them.
Incorporating mosses and evergreen plants can also add a touch of greenery and help maintain a visually appealing rock garden throughout the seasons. These plants can survive in rocky environments and bring life and color to your design.
When arranging the rocks, consider using gravel as a supportive layer to create a stable and well-drained surface for your plants. This can help prevent weed growth and keep the rocks in place.
Finally, if you wish to add some water features to your rock garden, such as a small pond or a flowing stream, make sure to choose rocks that can handle water and won’t deteriorate over time. Sealing the rocks can also help prevent water damage and keep them looking beautiful for years to come.
Creating a rock garden is an art form that requires careful consideration and attention to detail. By following these steps and incorporating the right rocks and plants, you can design a rock garden that is not only visually pleasing but also serves as a peaceful retreat in your own backyard.
For more rock garden design ideas and to receive a range of quotes from professional landscape designers, contact our company at [email protected]. Our team of experts will be happy to help you create the rock garden of your dreams.
Step 2 prepare the rocks by painting them with non-toxic paint
Once you have gathered all the rocks for your rock garden, it’s time to prepare them for their new role in your outdoor space. Painting the rocks with non-toxic paint adds an interesting touch to your rock garden, making it truly unique.
Using non-toxic paint ensures that the paint won’t harm the environment or any plants nearby. It’s also important to choose a paint color that complements the overall design of your rock garden. You can choose a single color or get creative by painting different designs or quotes on each rock.
Painting the rocks serves more than just an aesthetic purpose. It also helps define different areas of your rock garden and acts as stepping stones for people to walk on. You can paint arrows or symbols to guide visitors through your rock garden or paint inspiring quotes to make them feel motivated.
Before you start painting, make sure to clean the rocks thoroughly and remove any dirt or debris. Once they are clean and dry, apply a coat of non-toxic paint using a brush or sponge. You can also use a sealant to protect the paint from wearing off over time.
When choosing paint colors, consider the overall theme and feel of your rock garden. If you want a calming and serene atmosphere, opt for cool colors like blues and greens. If you want a more vibrant and energetic atmosphere, choose brighter colors like yellows and oranges.
If you’re unsure of what colors to use, take inspiration from the nature around you. Look at the colors of flowers, plants, and the landscape. For example, you can paint rocks to resemble different flowers like crocus, phlox, or winterbloom.
Another idea is to use Japanese rock garden inspiration. You can paint rocks with traditional Japanese motifs or patterns to create a Zen-like atmosphere.
Once you’ve painted all the rocks and allowed them to dry, you can begin arranging them in your rock garden. Feel free to get creative and experiment with different layouts and groupings. Remember, there’s no right or wrong way to do it, as long as it appeals to your own taste and vision.
Now that you have prepared the rocks by painting them, you’re one step closer to creating your own unique and low-maintenance rock garden. The rocks will serve as a neat and organized backdrop to your chosen plants and give your outdoor space a touch of artwork.
Step 3 use paint pens to create your artwork
Once you have completed the first two steps and your rock garden design is in place, it’s time to add some personal touches. Using paint pens, you can promote your artistic abilities and contribute to the beauty of your garden.
Rock gardens are a great way to engage with the community, as people passing by can pick up the individual rocks and admire the artwork. This creates a sense of connection and allows others to appreciate your creativity.
When choosing paint pens, consider the size and color. Select pens with a variety of tip sizes to allow for different designs and details. For example, a fine tip pen would be ideal for intricate patterns, while a broader tip can be used for bolder strokes.
For the colors, opt for ones that complement the natural surroundings. Earthy tones like bronzy-purple and coral can add a visually pleasing touch to the rocks. You can also use pens in shades of blue to create a coastal or beach-themed design.
Before starting your artwork, make sure to clean the rocks and allow them to dry. This ensures that the paint adheres properly and lasts longer. Consider researching different painting techniques and practices that professional garden designers use to get inspired.
Now, here’s a step-by-step guide on how to create something interesting:
Step 1: Think about the kind of design you want to create. It could be inspired by national landmarks, natural scenery, or even something unique to your own imagination.
Step 2: Use pencils or sketch pens to outline your design. This will give you a rough idea of how it will look on the rock.
Step 3: Start filling in the colors with the paint pens. Be mindful of the scale and size of your artwork to ensure it fits well on the rocks.
Step 4: If you need some inspiration, look for photos or artwork online. Many landscaping and garden design websites have dedicated sections showcasing rock artwork.
Remember, while you’re creating your artwork, keep in mind the overall feel and theme of your rock garden. The artwork should blend in harmoniously with the natural elements of the garden.
Finally, once your artwork is complete, allow it to dry for a few hours or as per the paint manufacturer’s instructions. This will ensure that the artwork stays intact and doesn’t smudge.
Using paint pens to add artwork to your rock garden is a simple and eco-friendly way to enhance its beauty. Plus, it’s a fun and creative activity that anyone can enjoy. So go ahead, grab your supplies, and let your imagination run wild!
Step 4 finally top coat your art with a non-toxic clear sealant
Now that you have created your rock garden masterpiece, it’s time to give it that final touch. In order to protect your design from the elements and ensure its longevity, it’s important to apply a non-toxic clear sealant. This will not only preserve the colors and patterns of your rocks, but also prevent fading and damage.
Where can you find this non-toxic clear sealant? Well, you can find it at your local garden supply store or even order it online. Make sure to look for a product that is specifically designed for outdoor use and is safe for plants and animals.
Before applying the sealant, it’s advisable to clean the rocks and remove any dirt or debris. You can use a gentle brush or cloth to do this. Once the rocks are clean and dry, you can start the sealing process.
While applying the sealant, make sure to follow the instructions on the label. It’s important to apply an even coat and cover the entire surface of each rock. This will ensure that your design is fully protected.
Whether you’re a seasoned gardener or someone who is just starting out, remember that creating a rock garden is all about expressing your individual style and bringing color and life to your outdoor space. By applying a clear sealant, you not only preserve your own work but also share your art with others.
So, whether you’re inspired by zen-like, idyllic rock gardens or prefer a more colorful and vibrant style, this final step is essential in completing your rock garden design. Take a step back and admire your work, knowing that it will last for years to come.
If you have further questions or need more inspiration, don’t hesitate to reach out to a local garden designer or join online groups where you can share photos and ideas. It’s always helpful to learn from others and get inspired by their creations.
Now that you know how to create a stunning rock garden, go ahead and start gathering your supplies. Whether you want to create a small rock feature or a larger garden with boulders, rocks, and creeping plants, the possibilities are endless.
Remember, creating a rock garden is not only about the end result but also about the process. Take your time, enjoy the journey, and let your creativity flourish. Happy rock gardening!
If you have any questions or need further assistance, feel free to email us at [email protected]. We’re here to help you with any rock garden-related matter!
Planning a group rock painting event
Are you looking for a fun and creative activity to bring your community together? Consider planning a group rock painting event! This is a fantastic way to promote social connections, engage with others, and support a sense of organization and community. Whether you live in Washington or any other part of the country, an event like this can be enjoyed by people of all ages.
Rock painting has become a popular trend in recent years, with people using rocks as a canvas to create beautiful works of art. By joining together for a rock painting event, you can tap into this creative outlet and enjoy a relaxing and inspiring time with others.
Here’s how you can go about planning a successful group rock painting event:
Step 1: Coordinate and Organize
In order to ensure a smooth and well-organized event, it’s important to coordinate with the group and choose a suitable time and location for the event. Consider finding a larger outdoor space, such as a park or garden, where everyone can gather comfortably.
Step 2: Gather Supplies
Make sure to have all the necessary supplies on hand. This includes rocks of various shapes and sizes, paintbrushes, acrylic paints in a range of colors, pens or markers, and sealers to protect the artwork. You may also want to include some inspirational photos or examples of rock paintings to help guide participants.
Step 3: Prepare the Rocks
Before the event, it’s important to properly prepare the rocks. Clean them with water to remove any dirt or debris, and let them dry completely. You can also coat the rocks with a layer of primer or white paint to create a smooth surface for painting.
Step 4: Paint and Create
Encourage participants to let their creativity flow and paint whatever they wish on their rocks. From intricate designs to simple patterns, the possibilities are endless. You can also provide guidance and suggest themes or specific designs to help inspire participants.
Step 5: Seal and Display
Once the painting is complete, seal the rocks with a clear sealer or varnish to protect them from the elements. This will ensure that the artwork lasts for a long time. Display the rocks in a prominent location, such as around the community garden, on a rock wall or path, or even in people’s homes.
A group rock painting event is not only a fun and creative activity, but it also lends itself to a sense of community and connection. It’s a great way to bring people together, promote social engagement, and support a shared love of art and nature. So gather your friends, family, and neighbors and start planning a rock painting event today!
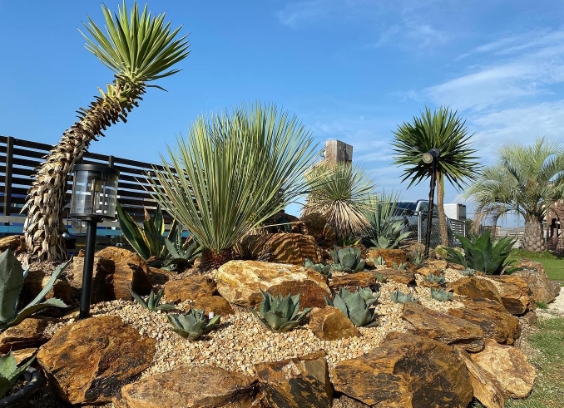
via @k_hey14_garden
How to create a community inspiration garden
If you are looking to create an interesting and inspiring space for your community, a community inspiration garden is a great idea. This type of garden can be a beautiful and welcoming space for people to come together, share ideas, and find inspiration. Here are some steps to help you create your own community inspiration garden:
Step 1: Planning and Design
Start by planning and designing your garden. Consider all the elements you want to include, such as plants, rocks, paths, and seating areas. Think about the style and atmosphere you want to create, whether it be tranquil and peaceful or vibrant and colorful.
Step 2: Choosing the Right Plants
When selecting plants for your community inspiration garden, choose a range of different species that will thrive in your local climate. Consider plants with interesting foliage, colorful flowers, and plants that attract wildlife, such as butterflies and birds.
Step 3: Creating Depth with Rocks
Incorporate rocks of different sizes and shapes into your garden design to create depth and contrast. Use rocks to define pathways, walls, or as focal points. Smooth, low-maintenance rocks can be a great addition to a community inspiration garden.
Step 4: Ensuring Proper Drainage
Good drainage is essential for a successful garden, so make sure you have the right materials and techniques in place. Consider adding drainage pipes or layers of gravel to prevent waterlogging and to promote healthy plant growth.
Step 5: Maintaining a Neat and Weed-Free Garden
To ensure your community inspiration garden always looks its best, regular maintenance is important. Weed regularly and prune any overgrown plants to keep them in check. Keep the garden tidy and remove any litter or debris.
Step 6: Adding Social Elements
In order to create a space that promotes interaction and community, consider adding social elements to your garden design. This could include seating areas, picnic tables, or a community notice board for events and announcements.
Step 7: Promoting Sharing and Inspiration
Encourage community members to share their own ideas and inspiration in the garden. Provide a space for people to leave notes or photos, or even create a community art project. This will help create a sense of ownership and community involvement.
Creating a community inspiration garden can be a wonderful way to bring people together and create a beautiful space for everyone to enjoy. By following these steps, you can create an inspiring and welcoming garden for your community that will be enjoyed for years to come.
Are you a corporation or organization who wants to join us
If you are a corporation or organization looking to evaluate your patio, garden, or landscape appearance, Rock Garden Ideas Design and Plants is here to help! Our team of inspiring designers can assist you in creating a rock garden that will complement your space and make it more inviting.
With our expertise in rock garden design, we can help you choose the right size, placement, and color of stones to create a beautiful and unique design. Whether you have a large or small area to work with, our designers will craft a design that suits your needs and goals.
Our designers can also help you incorporate various plantings into your rock garden. From crocus to phlox and winterbloom, we will help you choose the right plantings that will thrive in your environment. Additionally, we can provide guidance on the proper use of water, soil, and sealant to ensure the longevity and beauty of your rock garden.
By joining us, you will become part of a community of like-minded individuals and organizations who share a passion for beautiful and inspiring landscaping. We encourage collaboration and the sharing of ideas among our members, as we believe that together we can create stunning rock gardens that will enhance the appearance of our surroundings.
At Rock Garden Ideas Design and Plants, we welcome corporations, organizations, and individuals who want to bring the beauty and tranquility of a rock garden to their property. Whether you are a national chain or a local business, our designers will work closely with you to create a rock garden that reflects your unique style and vision.
Join us today and let our team of talented designers transform your outdoor space into something truly remarkable!
Rock garden ideas design and plants
Rock gardens are a popular choice for landscaping enthusiasts who want to add a unique touch to their property. Whether you have a small front yard or a larger backyard, rock gardens can be just the thing to draw attention and create visual interest in your outdoor spaces.
When designing your rock garden, it’s important to consider the type of plants you want to incorporate. Many people choose low-maintenance plants that are drought-tolerant and require minimal upkeep. Some popular choices include winterbloom, phlox, and conifers.
In addition to plants, rocks and stones are essential elements of any rock garden. Choose materials that complement the architecture of your home and the overall theme of your outdoor space. Interesting shapes and sizes can add visual contrast, creating a more visually appealing and engaging garden.
Maintaining a rock garden can be simple if you do your research and are well-prepared. Pruning and weeding are necessary tasks to keep your garden looking its best. Clearing out unwanted weeds and dead foliage will help your plants thrive and prevent any potential damage to your rock garden.
If you’re feeling crafty, you can incorporate artwork or interesting structures into your rock garden. Use various materials such as wood, pavers, or even non-toxic sealers to create unique features that will make your garden stand out from the rest.
Looking for inspiration? There are many online resources and community centers that offer rock garden ideas and designs. You can also contact your local gardening club or horticulture school for more information. Connecting with other gardening enthusiasts can be a great way to share ideas and receive valuable advice.
So, whether you’re a seasoned gardener or just starting out, rock gardens can be a wonderful addition to any outdoor space. Get inspired, do your research, and let your creativity flow. Rock garden design and plants can bring life to your property and provide a beautiful and lush backdrop to enjoy throughout the seasons.
Planning a rock garden
Rock gardens are a stunning addition to any landscape, adding visual interest and an artful touch. Whether you have a large hillside or a small patch of grass, incorporating rocks into your garden design can transform it into a beautiful and unique space.
When planning a rock garden, it is important to consider the location and size of the area. Choose a sunny spot with well-drained soil to ensure that your plants thrive. Take a walk around your property and trace the path of the sun throughout the day to determine the best location for your rock garden.
Next, decide on the type of rocks you want to use. Smooth, beach-like stones can create a soft and calming atmosphere, while boulders can add an interesting focal point. Consider using rocks of various sizes and shapes to create texture and dimension in your garden.
Once you have chosen your rocks, it’s time to pick the plants. Native plants are a great choice for a rock garden, as they are adapted to the local climate and soil conditions. Creeping plants, such as creeping thyme or winterbloom, can fill in the gaps between rocks and create a lush and defined look.
When it comes to planting, make sure to group plants with similar water and sunlight needs together. This will make it easier to care for them and ensure that they thrive. Remember to prune any tree branches or other plants that may overshadow your rock garden and steal its spotlight.
Before you start building your rock garden, be sure to contact your local landscaping center or garden store for advice and supplies. They can help you choose the right rocks and provide you with non-toxic sealant to coat them, if desired.
Join an organization such as The Kindness Rocks Project to share and connect with other rock garden enthusiasts. They often have meet-ups and events where you can learn more about rock garden design and get inspiration from other people’s creations.
Finally, consider adding an element of personalization to your rock garden. Whether it’s a bell, a connector or a small sign, these little touches can make your rock garden truly unique. Add a simple email address like [email protected], so that people can contact you and share their thoughts.
With careful planning and organization, your rock garden can become a beautiful oasis in your yard. Take the time to plan it out properly, and soon you will have a landscape that is not only visually stunning, but also reflects your personal style and love for nature.
Building a rock garden is a creative and fulfilling endeavor. It allows you to create a beautiful and unique space in your backyard or property. So, grab your tools and rocks, and start building your own rock garden today!